背景
最近在学习 canvas 的使用,并写了个 demo,就是做一个 K 线图,支持提示、拖拽、缩放,也发布为 npm 包:echarts-for-abc
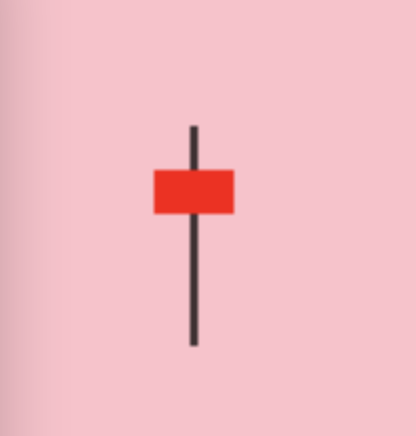
效果如图所示

写代码过程中,封装是必不可少的一部分,所以想以这个为例子来讲一下封装。
目的
封装的目的,是为了减少代码量。
定义
万物皆对象,对象具有属性和行为(方法),对象公共属性和行为的提取就是封装。
理念
封装的前提,必定跟场景相关联的,也就是说,先有场景,再有封装。封装前,先把场景下的属性具象化出来,再考虑提取他们的共性。如果跳过这一步直接思考他们的共性,这很容易出现思考偏差。
举个例子:一个学校里面,有老师、学生、校长等各角色,不同角色有自己的特点和行为,比如学生有学号,老师有职位等级、类型,他们也有共同的特性,比如拥有性别、年龄等特点,用类(class)来表示各个角色。
将学生和老师用代码抽象化表示:
1
2
3
4
5
6
7
8
9
10
11
12
13
14
15
| class Student {
constructor(studentNumber, sex, age) {
this.studentNumber = studentNumber;
this.sex = sex;
this.age = age;
}
}
class Teacher {
constructor(rank, sex) {
this.rank = rank;
this.sex = sex;
this.age = age;
}
}
|
发现学生和老师都有性别和年龄,那就可以提取出来,所以可以很容易用Person封装起来,
1
2
3
4
5
6
| class Person {
constructor(sex, age) {
this.sex = sex;
this.age = age;
}
}
|
然后就可以使用extends让子类(学生)继承父类(Person)的属性
1
2
3
4
5
6
7
8
9
10
11
12
13
14
15
16
17
18
19
20
21
22
23
| class Student extends Person {
constructor(studentNumber, sex, age) {
super(sex, age);
this.studentNumber = studentNumber;
}
}
const student1 = new Student('330311221', '男', 15);
class Teacher extends Person {
constructor(rank, sex, age) {
super(sex, age);
this.rank = rank;
}
}
const teacher1 = new Teacher('高级教师', '女', 35);
|
封装颗粒度
封装颗粒度表示函数的拆分程度,是否越细越好呢,其实不是。
在项目中,如果组件拆的过于细,可能会导致父组件的参数向子组件一层层传递时,会出现遗漏,传错等问题。如果拆的太粗,会导致难以复用、难以维护等问题,那么怎样的颗粒度大小才算合适呢?封装的颗粒度大小,取决于不同场景下的偏向性考虑。
考虑偏向性
封装偏向性可以分为两种,偏应用还是偏底层。
偏应用:这个封装只适用你这个特定的场景
偏底层:具有独立性,颗粒度更小,可以脱离特定场景,就像工具方法,如 Lodash 工具库
工具方法:是一个纯函数,传入参数,返回结果。也就是说不要在工具方法内部获取外部变量,要作为参数传入。
考虑哪种偏向性,取决于场景,所以进入“写一个 K 线图 demo”的场景,来聊一聊封装。
举例说明
可以看到图中的蜡烛出现了 10 次,那么如何封装渲染蜡烛的这个函数呢?是封装单个蜡烛合适还是一串蜡烛合适?
如果作为单个蜡烛的出现,我们只需要知道蜡烛横坐标、蜡烛宽度、颜色以及四个点的纵坐标就能绘制出蜡烛,代码如下:
1
2
3
4
5
6
7
8
9
10
11
12
13
14
15
16
17
18
19
20
21
22
23
24
25
26
27
28
29
30
31
32
33
34
35
36
37
38
39
40
41
42
43
44
45
46
47
48
49
|
function renderCandle(
abscissa,
topPointY,
bottomPointY,
secondPointY,
thirdPointY,
candleW,
candleColor,
) {
const halfCandleW = candleW / 2;
ctx.beginPath();
ctx.moveTo(abscissa, topPointY);
ctx.lineTo(abscissa, secondPointY);
ctx.closePath();
ctx.stroke();
ctx.beginPath();
ctx.moveTo(abscissa, bottomPointY);
ctx.lineTo(abscissa, thirdPointY);
ctx.closePath();
ctx.stroke();
ctx.beginPath();
ctx.moveTo(abscissa - halfCandleW, secondPointY);
ctx.rect(
abscissa - halfCandleW,
secondPointY,
candleW,
thirdPointY - secondPointY,
);
ctx.fillStyle = candleColor;
ctx.fill();
}
renderCandle(50, 88, 50, 44, 33, 20, 'red');
|
这个函数的封装偏向性就属于偏底层封装,它具有独立性,颗粒度更小,复用率更高,就像在 Echarts 图标库里,有多个应用到单个蜡烛的地方,就可以使用这个工具函数,你只需要传入相关参数即可。
但在我这个练习 demo 中,单个蜡烛并没有独立出现的场景,我考虑偏应用封装,而且在渲染蜡烛之前我需要处理数据源、判断涨跌以及蜡烛颜色的情况,所以将这些处理逻辑和绘制蜡烛封装为一个函数,不管在阅读还是使用上都更为方便,我的代码为:
1
2
3
4
5
6
7
8
9
10
11
12
13
14
15
16
17
18
19
20
21
22
23
24
25
26
27
28
29
30
31
32
33
34
35
36
37
38
39
40
41
42
43
44
45
46
47
48
49
50
51
52
53
54
55
56
57
58
|
function renderCandles(data, candleW) {
const dataYAxisPoint = tranPriceToOrdinate(data);
const halfCandleW = candleW / 2;
for (let i = 0, candleLength = dataYAxisPoint.length; i < candleLength; i++) {
const { heightPrice, lowPrice, openingPrice, closingPice } =
dataYAxisPoint[i];
let abscissa = xAxisTickPointX(i),
topPointY = heightPrice,
bottomPointY = lowPrice,
secondPointY,
thirdPointY,
candleColor;
if (closingPice < openingPrice) {
candleColor = 'red';
secondPointY = closingPice;
thirdPointY = openingPrice;
} else {
candleColor = 'green';
secondPointY = openingPrice;
thirdPointY = closingPice;
}
ctx.beginPath();
ctx.moveTo(abscissa, topPointY);
ctx.lineTo(abscissa, secondPointY);
ctx.closePath();
ctx.stroke();
ctx.beginPath();
ctx.moveTo(abscissa, bottomPointY);
ctx.lineTo(abscissa, thirdPointY);
ctx.closePath();
ctx.stroke();
ctx.beginPath();
ctx.moveTo(abscissa - halfCandleW, secondPointY);
ctx.rect(
abscissa - halfCandleW,
secondPointY,
candleW,
thirdPointY - secondPointY,
);
ctx.fillStyle = candleColor;
ctx.fill();
}
}
|
总结
- 封装的理念为:把场景下的属性和方法具象化,提取共性
- 封装的颗粒度大小,取决于不同场景下的偏向性考虑